participating
This page explains how to contribute data to a running ghini site.
your account
You need an account for the site, it needs to be enabled, and to make you part of the staff. You do not need superpowers to contribute data.
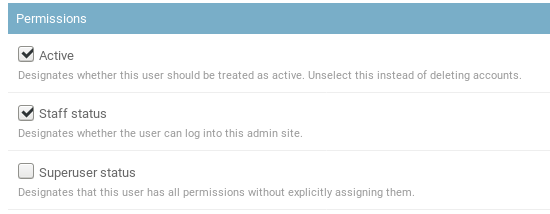
When logged in as staff member, you will see the Insert menu next to the Ghini icon, before the Tools menu,

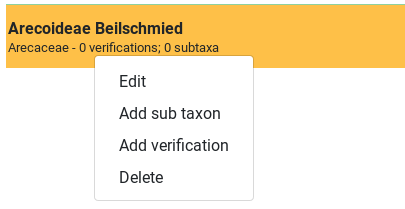
moreover, in the Results page, right-clicking on any results row will show the context menu associated to the row type.
If you do not see these, you are being handled by the software as a visitor, and you need to logout and log back in with your full permissions.
organize your pictures
The software requires that you organize your plant images by physical plant, and by accession. Please make sure your data follows this order before you start.
A running definition of a database accession for plants photographed in the wild, it is a group of nearby plants, clearly of the same species and variety, very likely of the same age, and clearly belonging to the same population. Decide for yourself if you want to use the term accession as a synonym for population.
A running definition of a database plant for the same case, that would be a group of plants within the same accession, difficult to separate from one another. They all share the same geographic coordinates, and you can provide a reasonable estimate of the number of individual plants composing the group.
bulk inserts
If you have a large amount of accessions that you want to document with plant images, you
may request a bulk insertion. Please write a friendly email to Mario Frasca
<ghini@anche.no>, stating your needs. It makes sense if you have more than, say, twenty
accessions.
adding images
The basic logic is: first have all your accessions in place, which you either do manually, or with a request for bulk insertion, then navigate to the URL for adding plant images.
You will be presented with this form:
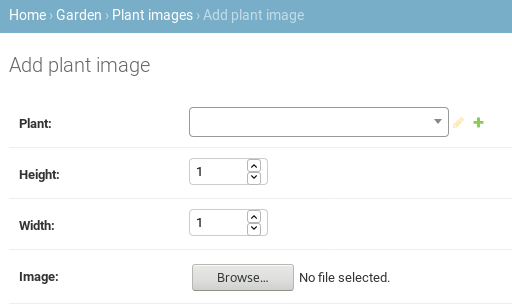
In this form you basically repeat: choosing a plant from the database, choosing a picture from your file system, then click on one of the three Save buttons:

If you are adding an image for a plant already represented in the database, simply start
typing the plant accession number, and the software will present you the plants matching the
text you are typing. Each time the image is relative to a new plant, you need to add the
database object that describes the plant in question. You do so by clicking on the +
button next to the plant chooser widget.
This will open a new window,
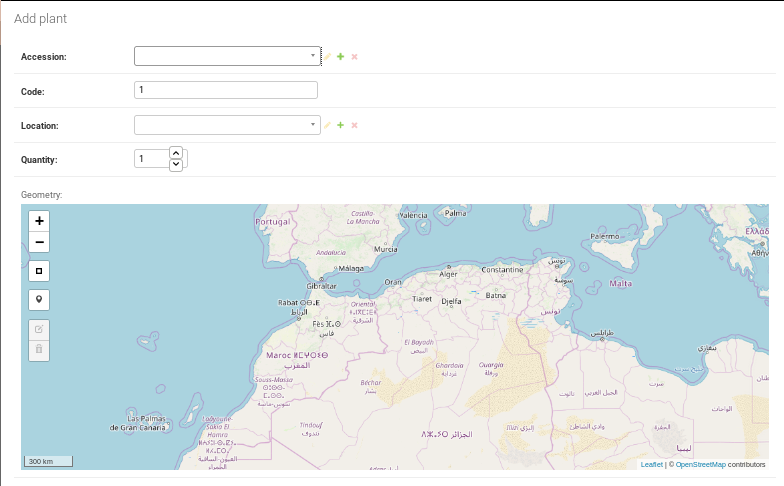
Here you choose your accession, indicate a numerical sequential value for the plant code within the accession (you need to so manually), select or add a plant location (it would be the name of the area for your observations), provide an estimate of the quantity of individual plants in the plant group, and use the geometry map to indicate an approximate plant position. You do so by activating the draw a marker widget, then clicking on the approximate spot in the map. Zoom in or zoom out, and peruse the other widgets as necessary.
Do not forget to Save your changes.
Back to your Plant Image insertion window, browse to your image, confirm by save or
save and add another.